Connect a custom MCP connector in Claude (2026 UI, screenshots)
Where the connector settings actually live now (they moved), the Add custom connector dialog, the optional OAuth fields, and what happens when Claude runs the OAuth flow, captured from the live claude.ai UI.
claude · updated 2026-08-22
Most walkthroughs (ours included, until now) tell you to open Settings →
Connectors in claude.ai. As of 2026 that page is a redirect stub; the real
thing moved. Here’s the current flow, screenshotted from the live UI, using
our own OAuth-protected demo endpoint (https://quickoauth.com/mcp-auth) as
the connector.
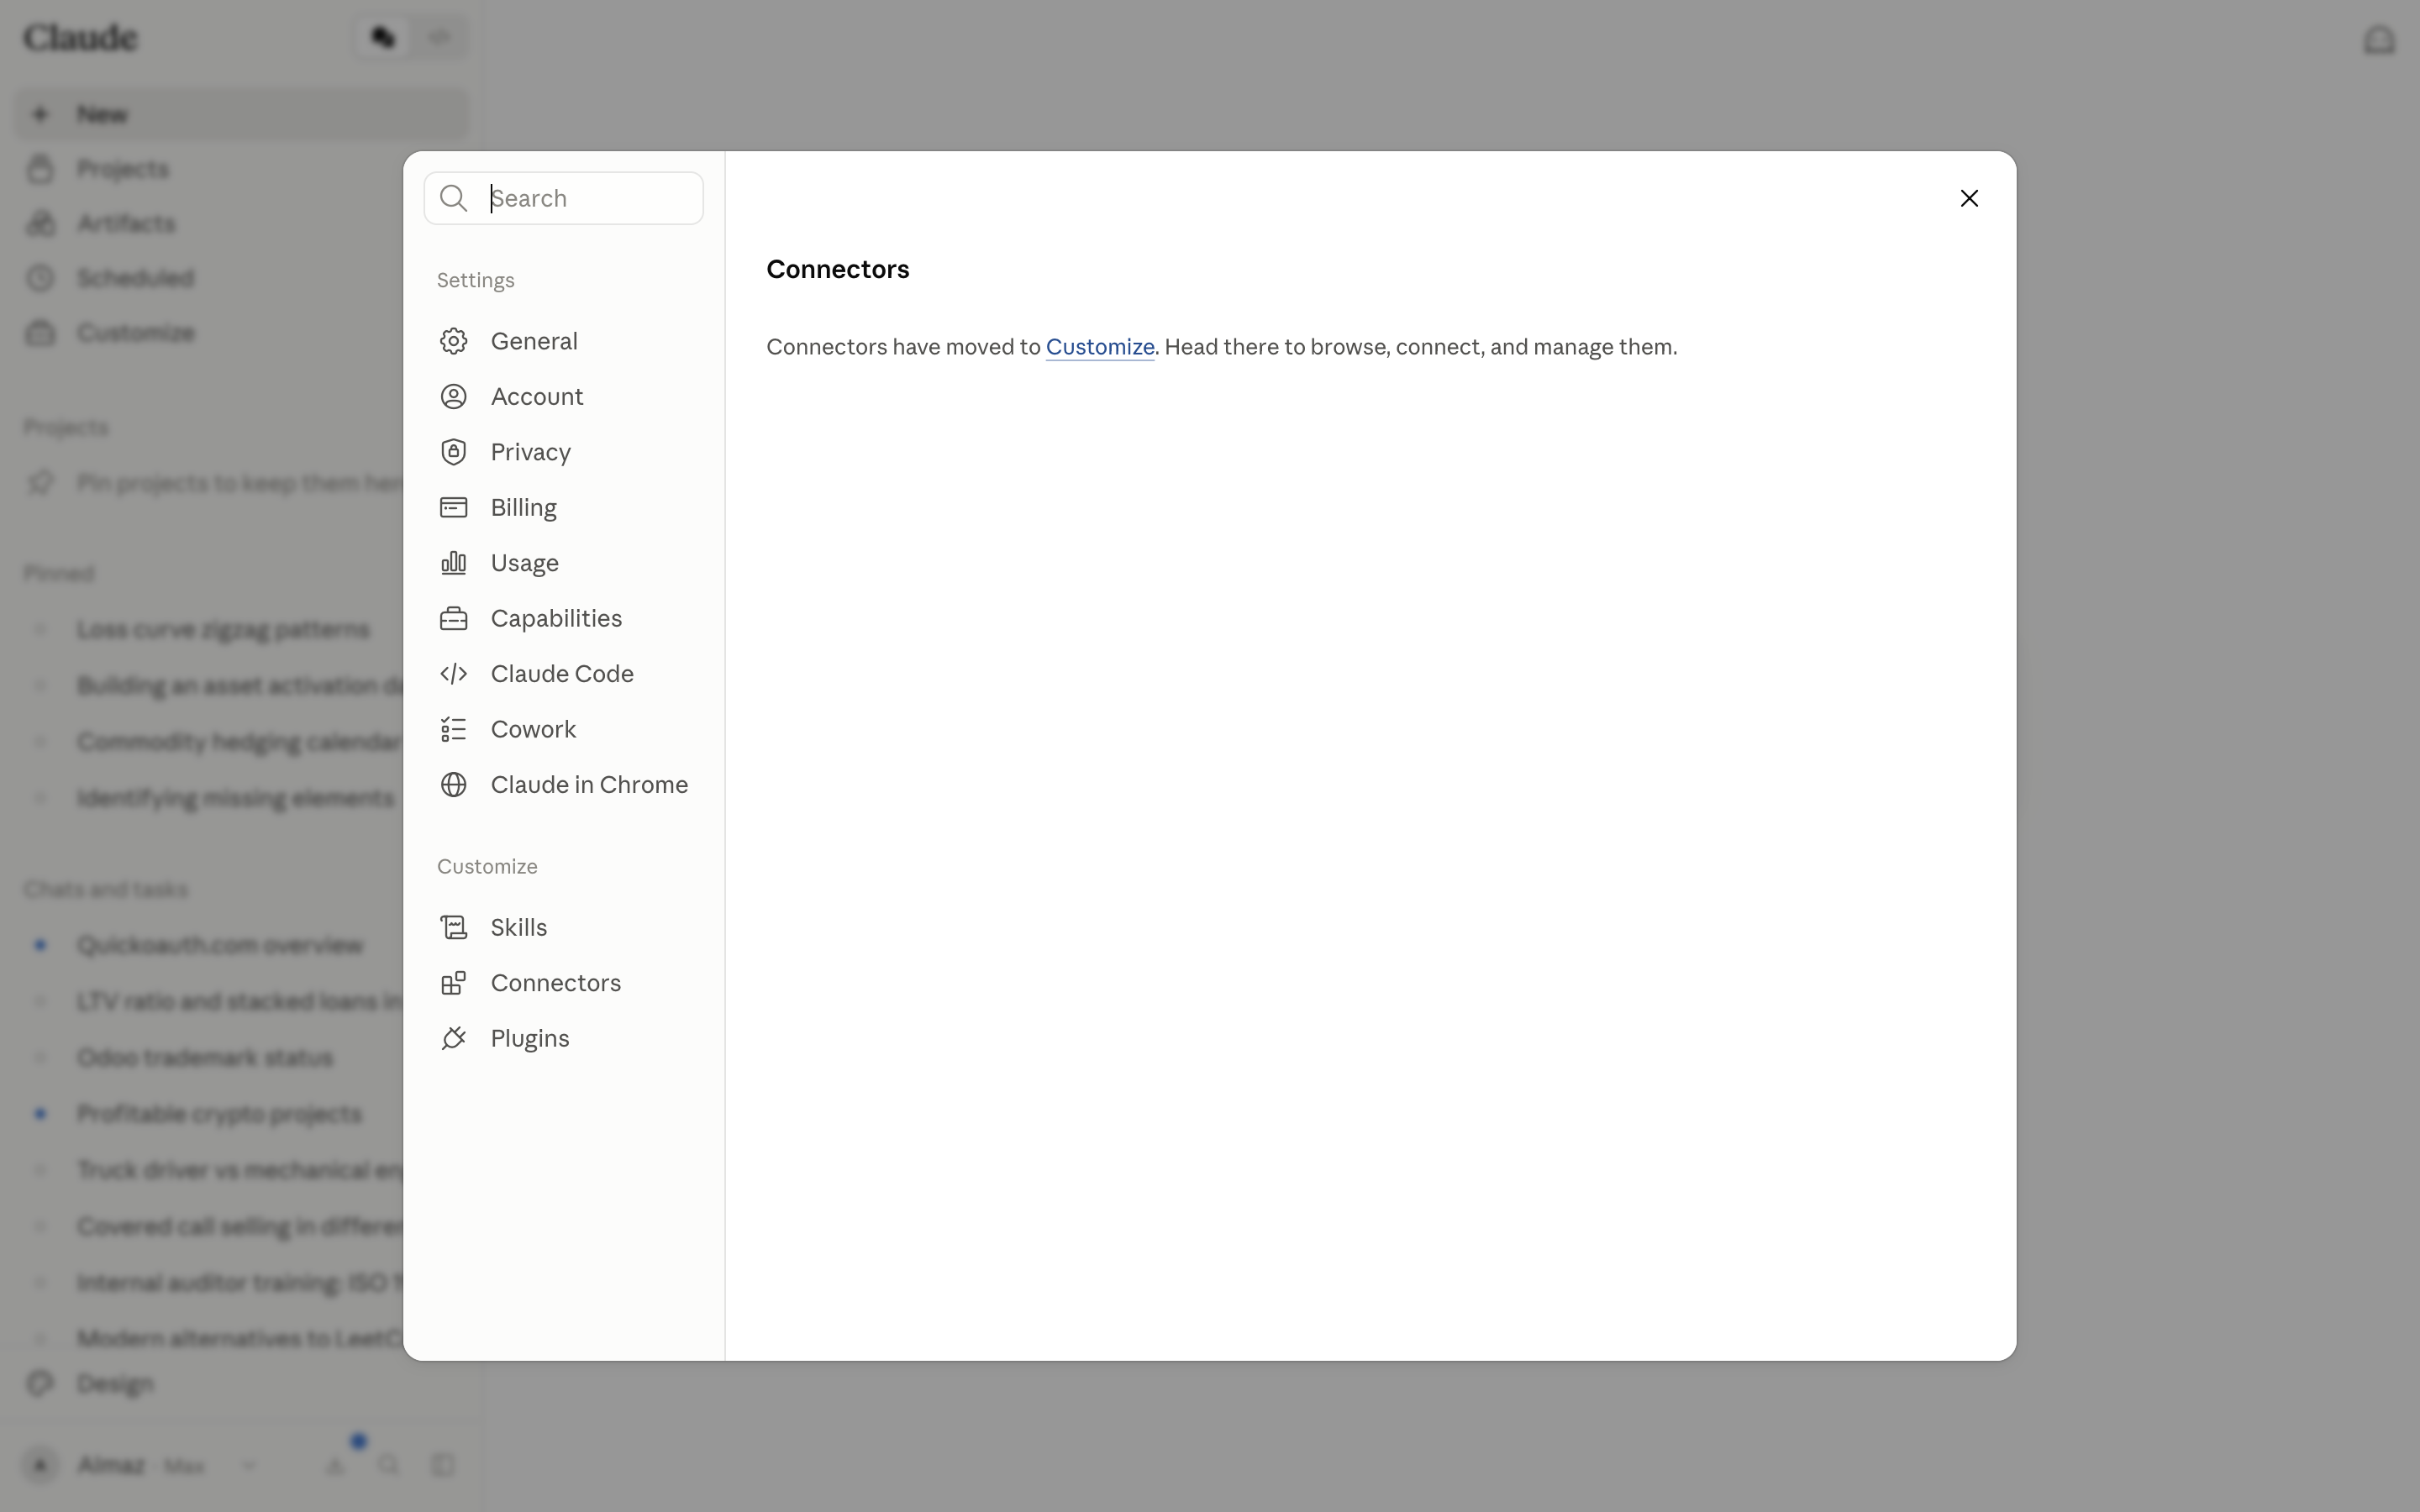
1. Connectors moved to Customize
In Settings, the old Connectors entry now just points you elsewhere:
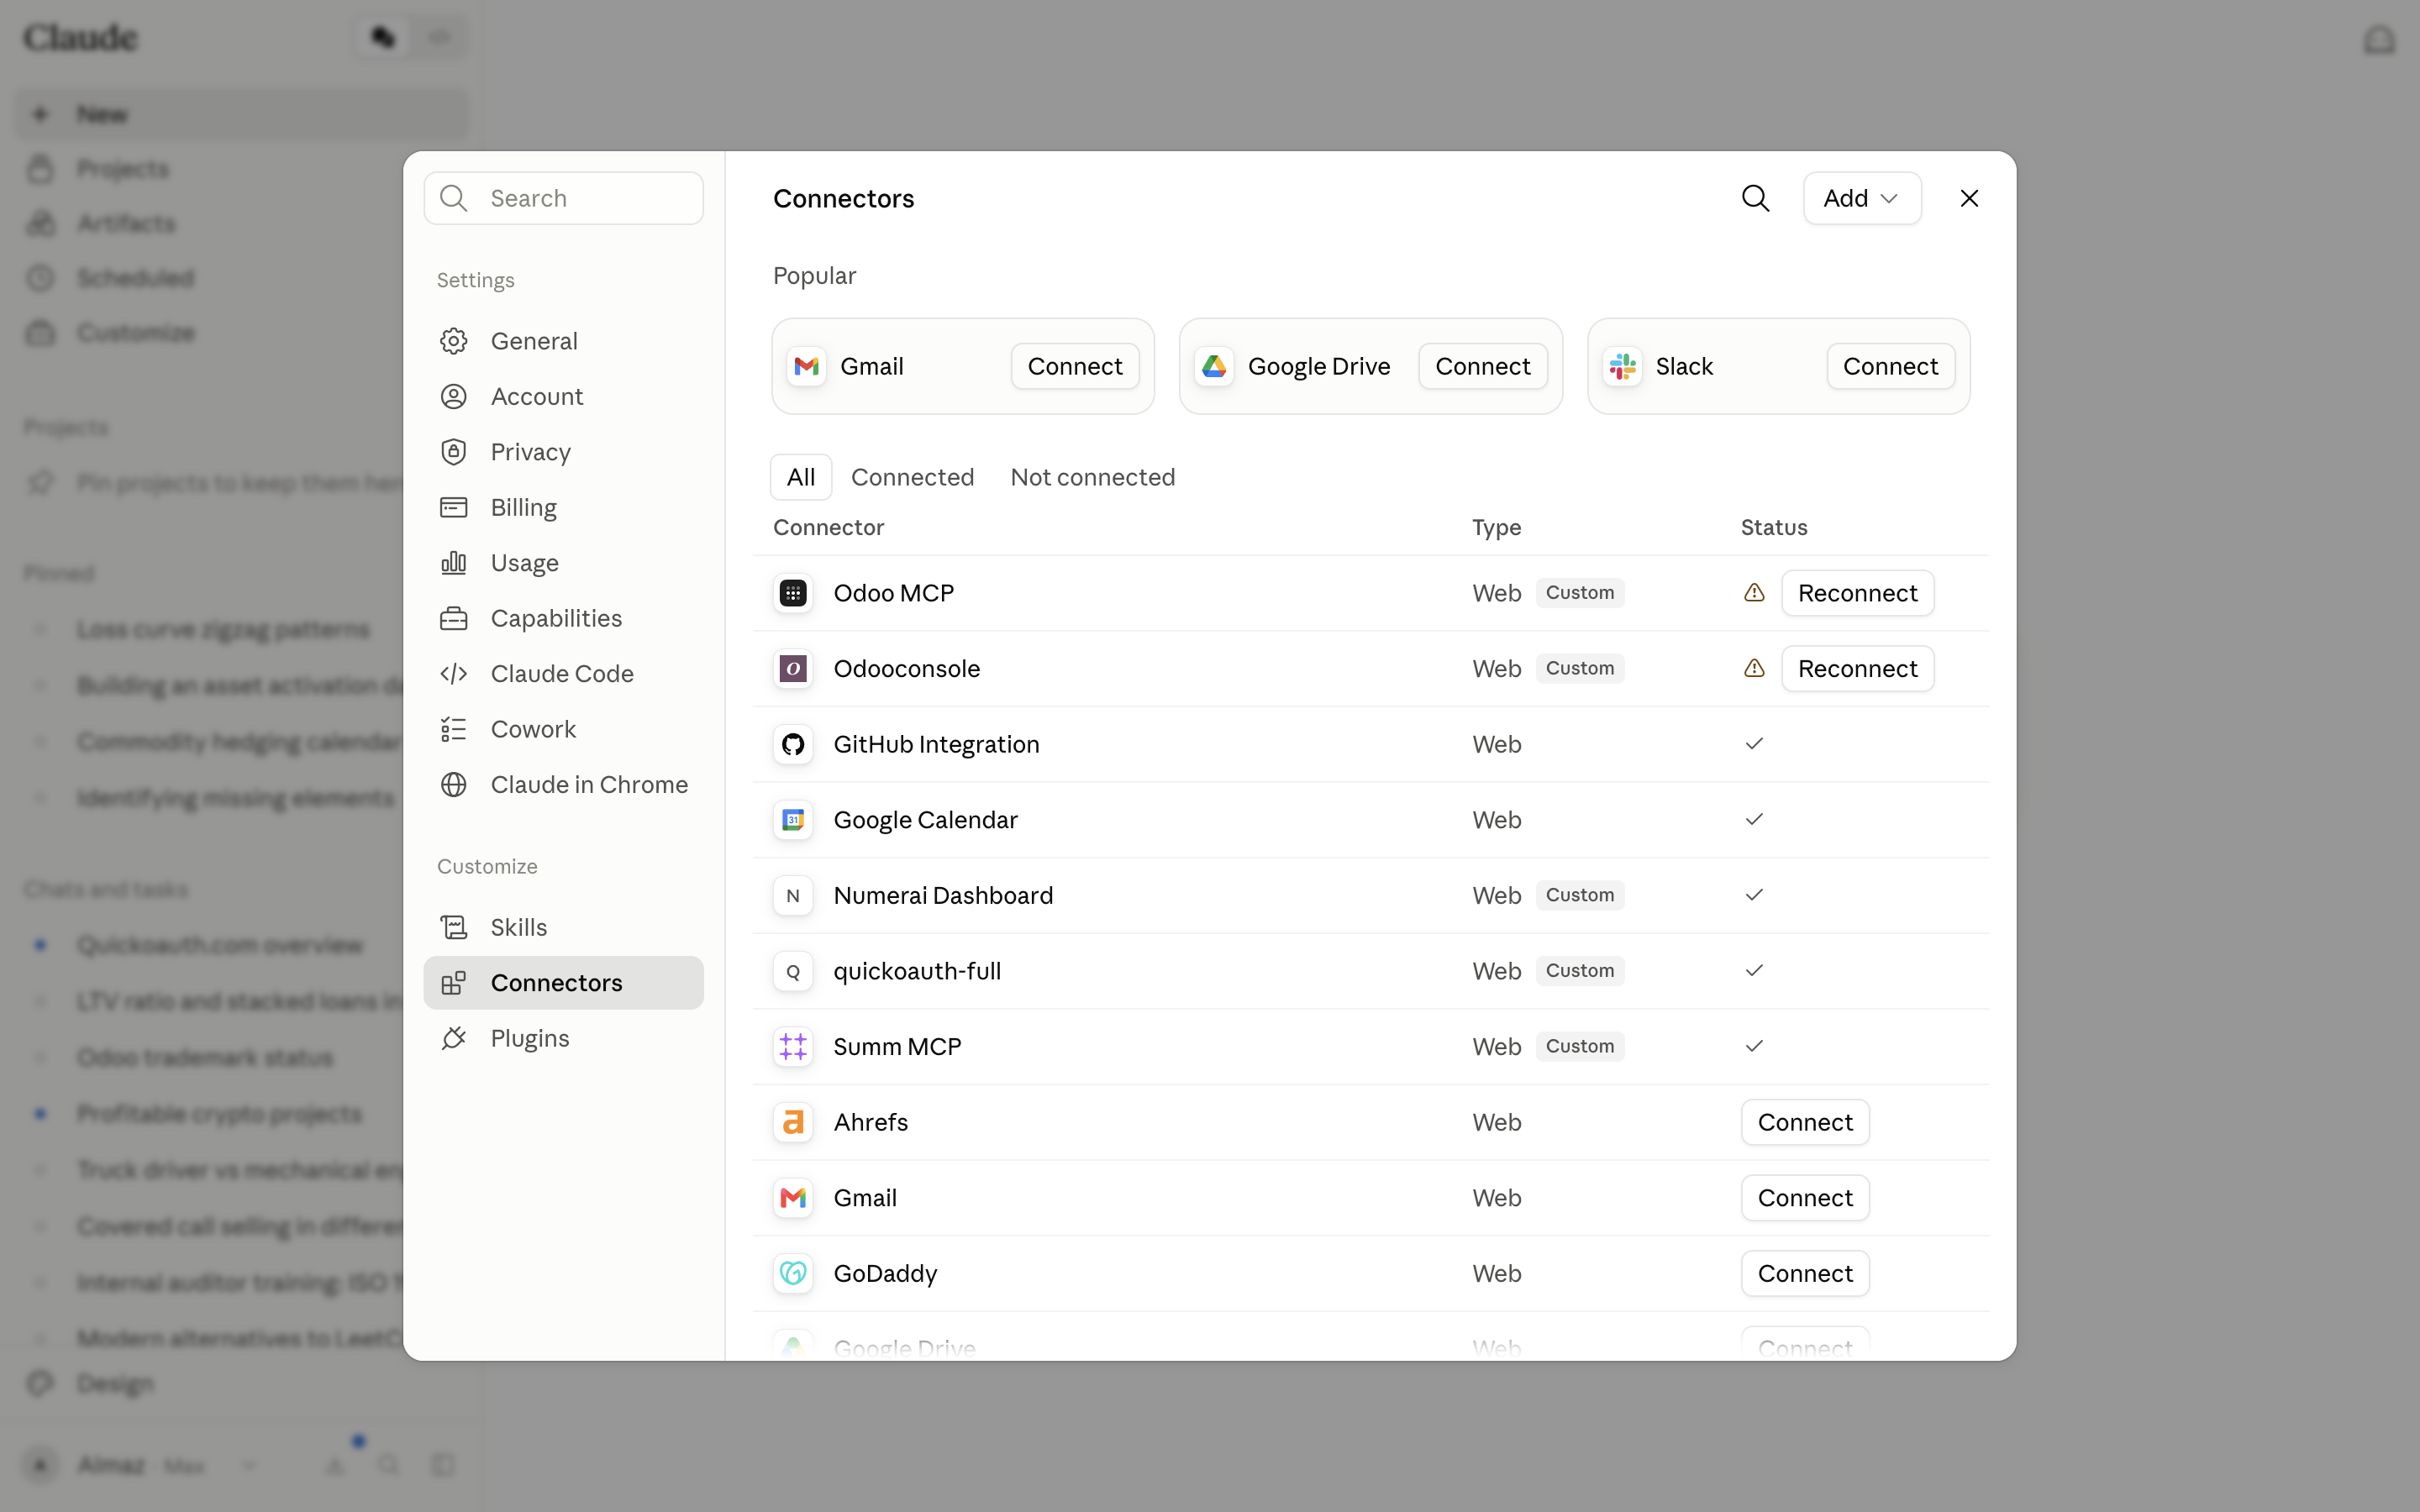
The live list lives under Customize → Connectors. Custom (self-hosted MCP) servers show a Custom badge; a checkmark means connected, a warning triangle means the token expired and you need to Reconnect.
2. Add → Add custom connector
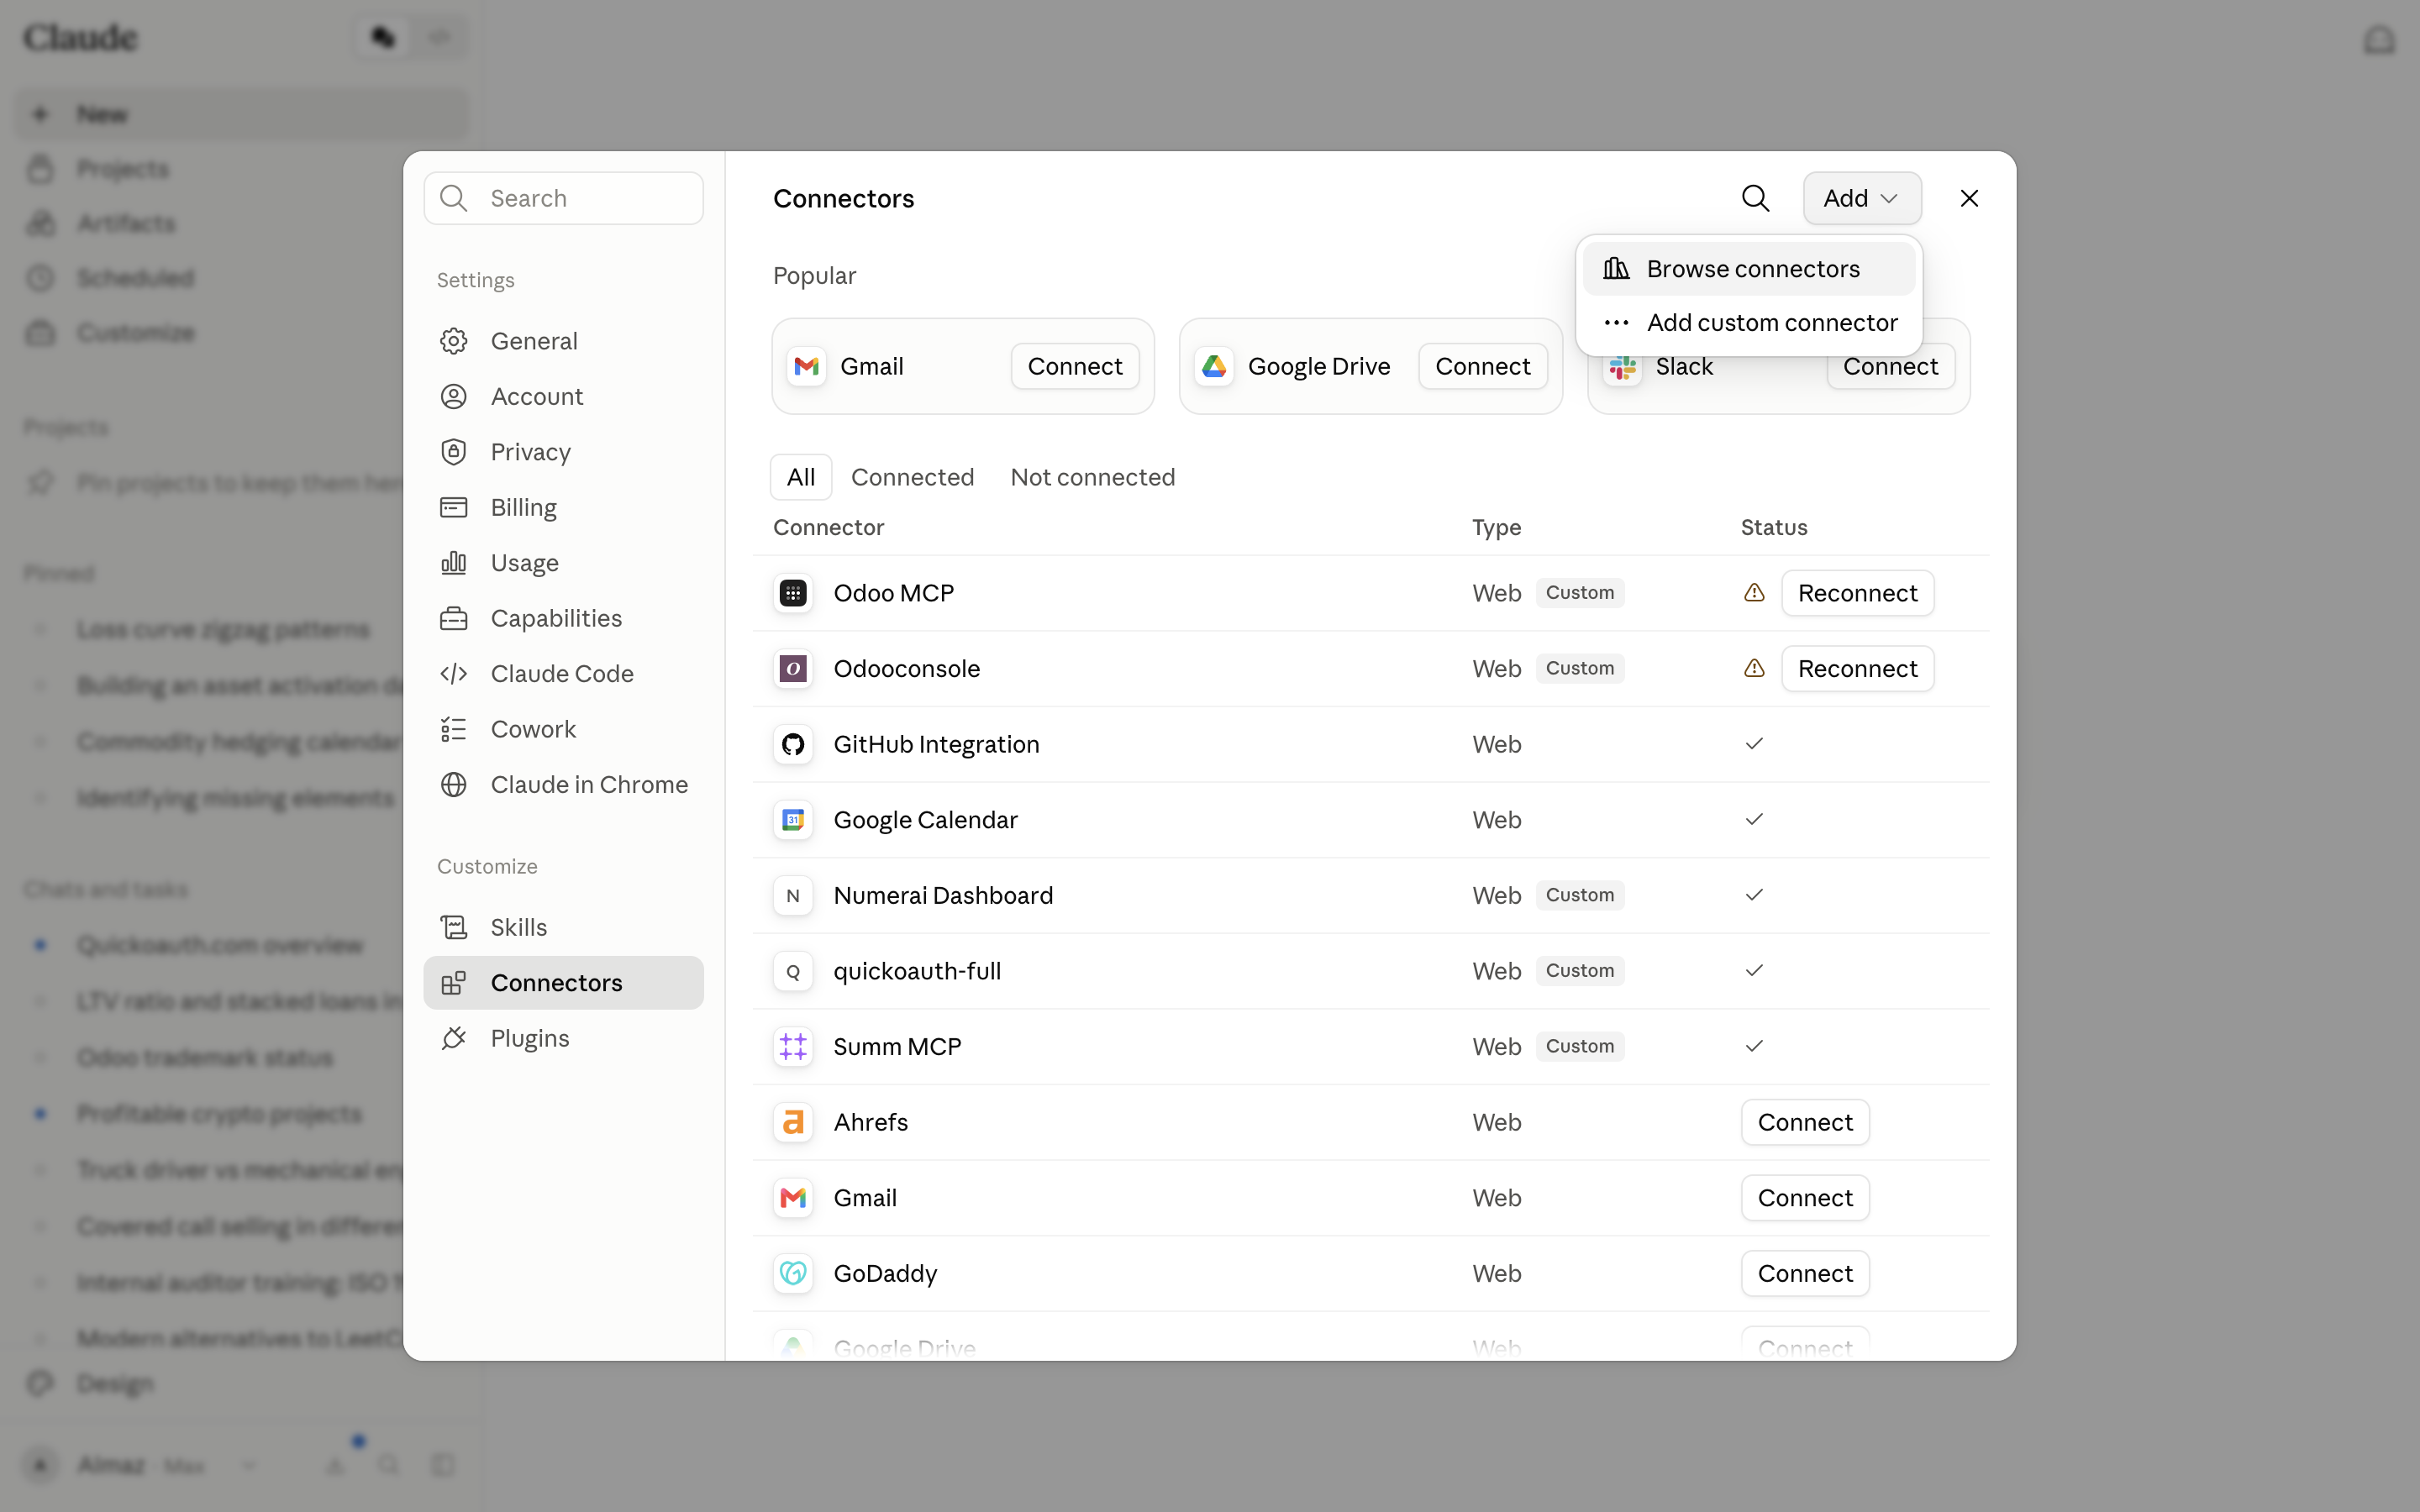
The Add dropdown (top right) has two options: Browse connectors (the directory of pre-built ones) and Add custom connector (any remote MCP server by URL).
3. Fill in the URL and note the OAuth fields
You need two things: a display Name and the Remote MCP server URL (the
HTTPS address where your server accepts MCP requests, e.g.
https://mcp.example.com/mcp). Expand Advanced settings and you’ll see
OAuth Client ID and OAuth Client Secret, both optional.
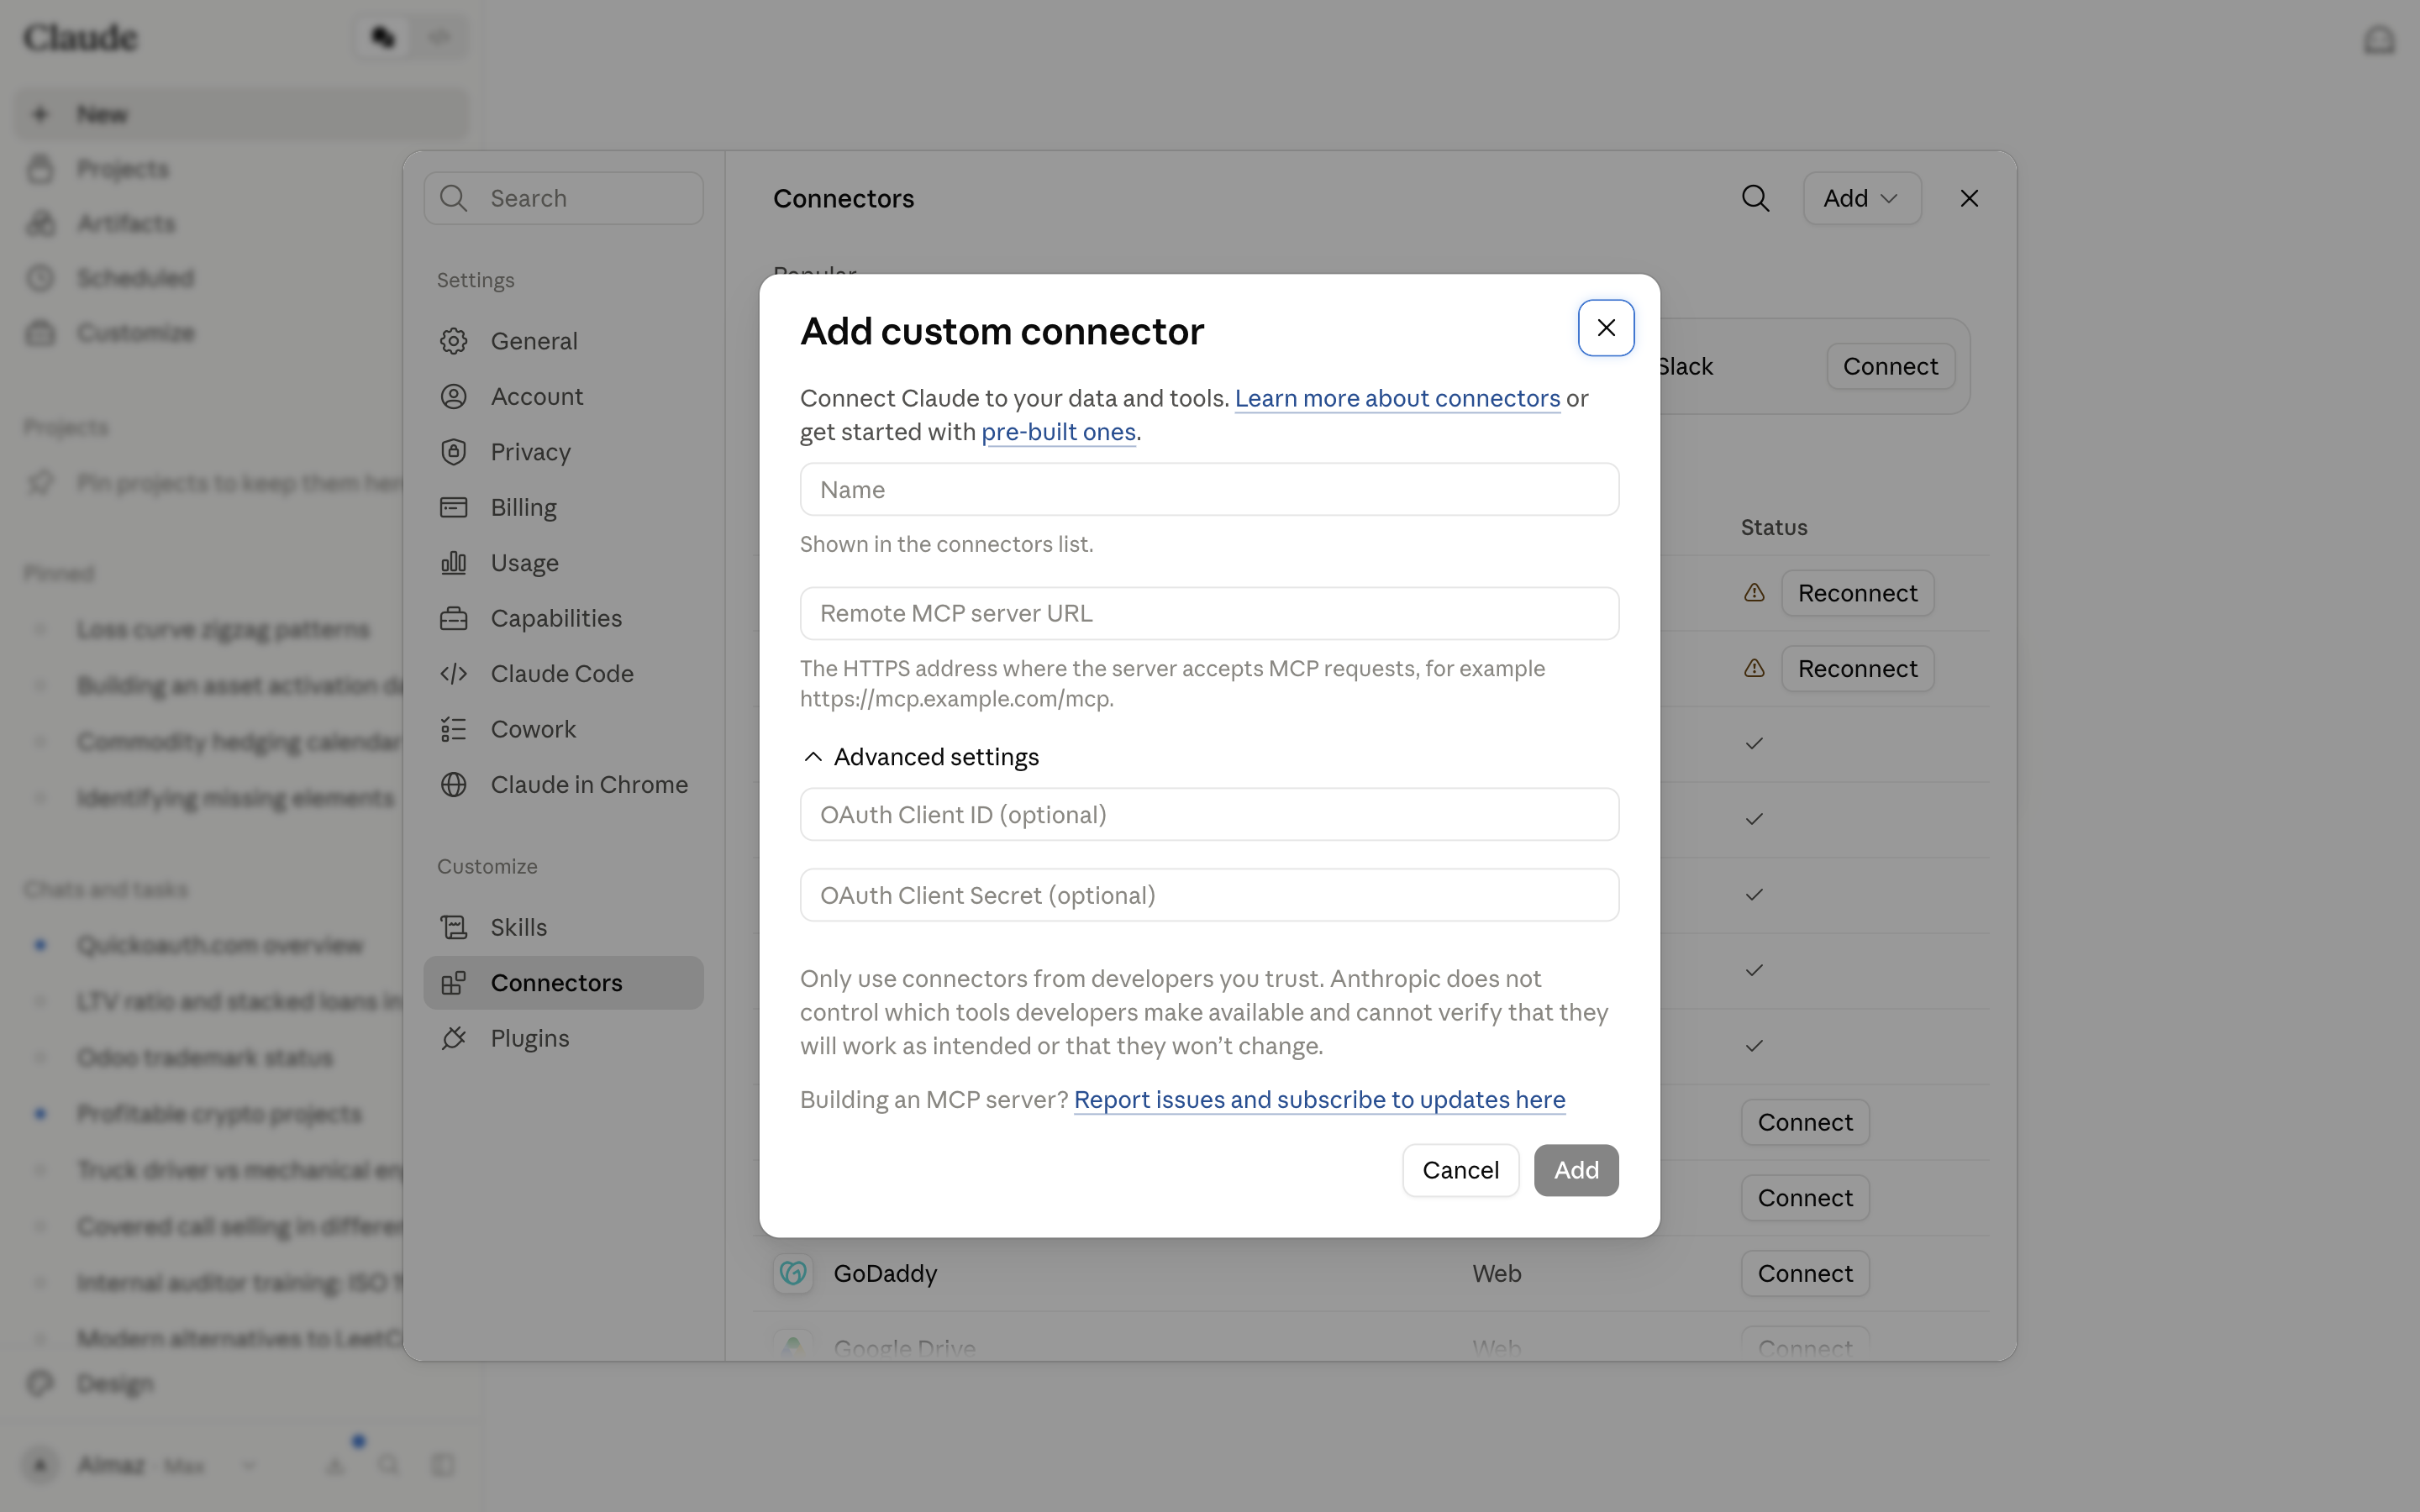
This is the important part for OAuth: leave those two fields blank. For a
correctly built MCP server, Claude discovers everything itself: it fetches
your /.well-known/oauth-protected-resource, follows it to your authorization
server’s metadata, and dynamically registers its own client (DCR) to get a
client ID. You only fill in Client ID/Secret for the rare server that requires
a pre-provisioned static client and doesn’t support DCR. If you built your
server from any of our provider guides, blank is correct.
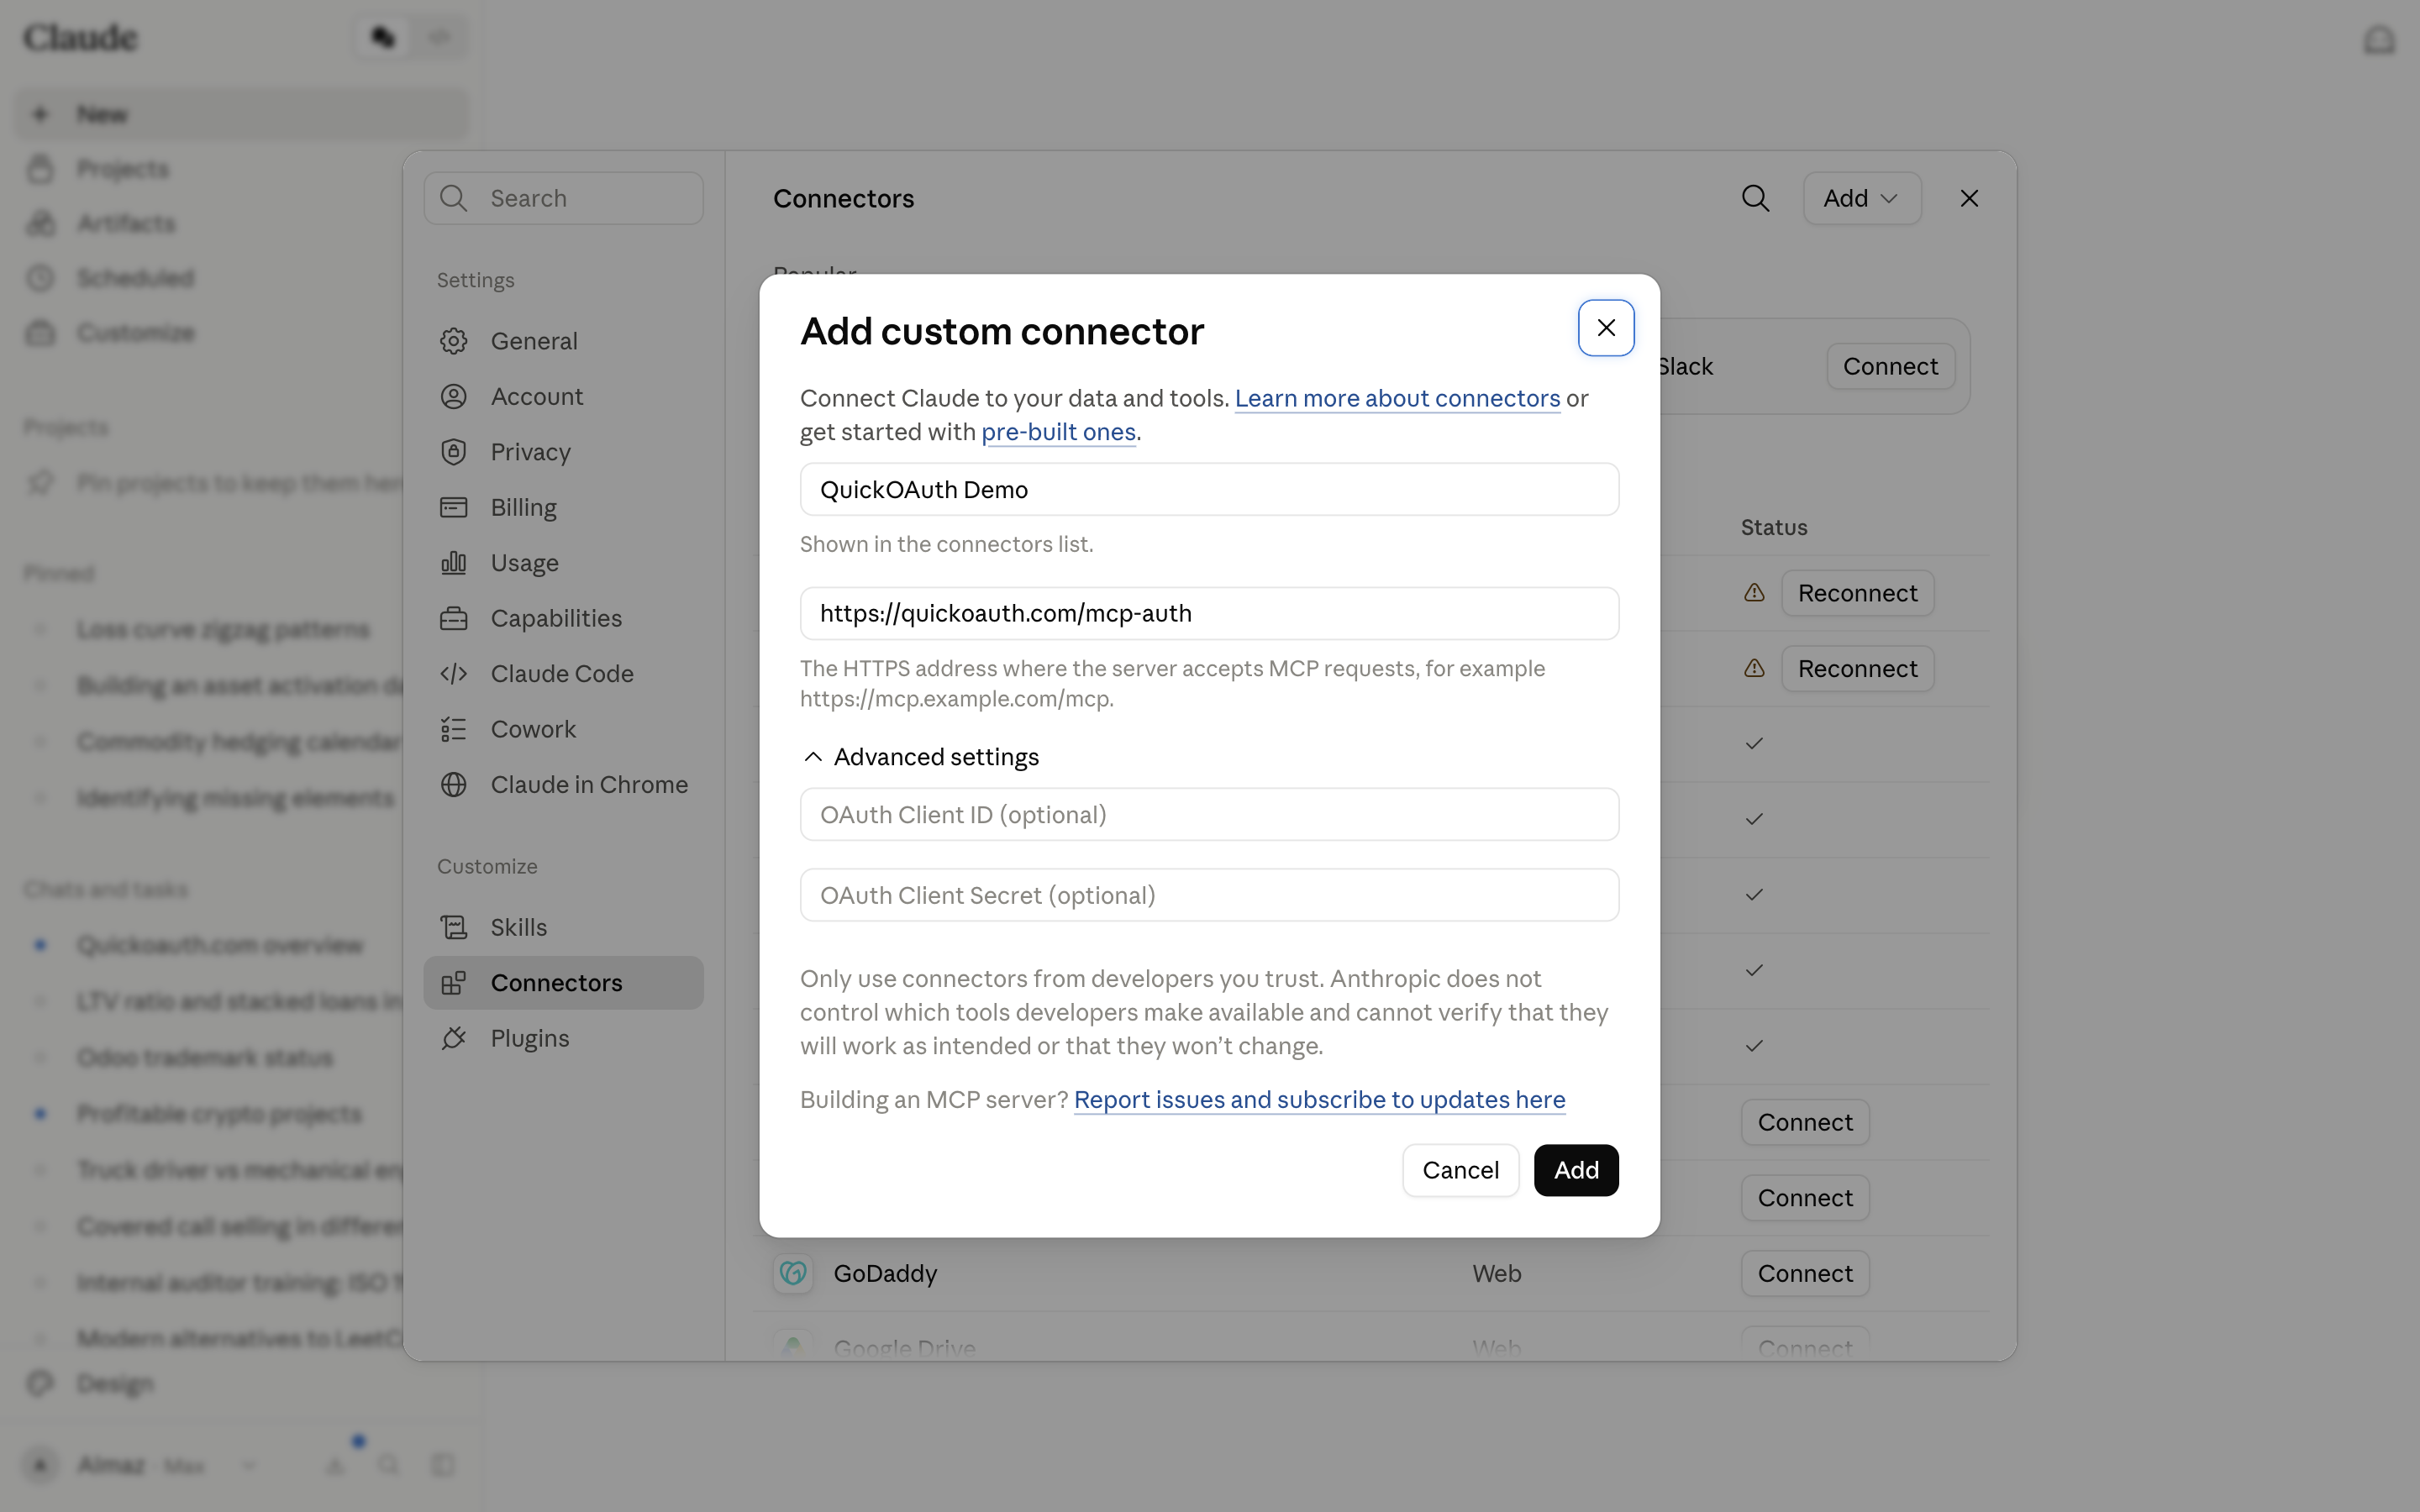
4. Click Add → Claude runs the OAuth flow
On Add, Claude immediately runs the discovery + DCR sequence and then opens your authorization server’s login/consent page. Approve it, and the connector lands in the list with a checkmark and its tools available in chat. If the URL is already registered you’ll get “A connector with this URL already exists”; manage the existing one instead of adding a duplicate.
What Claude expects from your server
The connect step fails silently in the dialog if any of these are missing; this is exactly what our connector checklist verifies with four curls before you ever open this dialog:
401(never 403) on an unauthenticated request, with aWWW-Authenticate: Bearerheader naming yourresource_metadataURL.- A reachable
/.well-known/oauth-protected-resourcepointing at your authorization server. - That server’s
/.well-known/oauth-authorization-serveradvertising aregistration_endpointandS256. - A working DCR endpoint that returns a
client_id.
Claude posts its callback https://claude.ai/api/mcp/auth_callback (also
claude.com/...) during registration, so your server must accept whatever
redirect URI the client registers.
Next steps
- Before adding a connector, run the four-curl self-test in the connector checklist: it catches every failure this dialog would only show as a silent spinner.
- If you need the authorization server first, follow a provider guide: Auth0, Stytch, Supabase, or self-hosted Hydra.
- For the same server in ChatGPT and Grok, see how the three clients differ and one server, three connectors.
If the flow errors out, debugging connector failures walks the probes in order.
Metadata
- Commit
- c6eb99c
- Browser
- —
- Current Time
- —
- Dimensions
- —
- Source
- guides
- Last Updated
- 2026-08-22